| |
|
The walkthrough
|
| |
|
Step 1: Open the avatar recorder
|
| |
|
| |
|
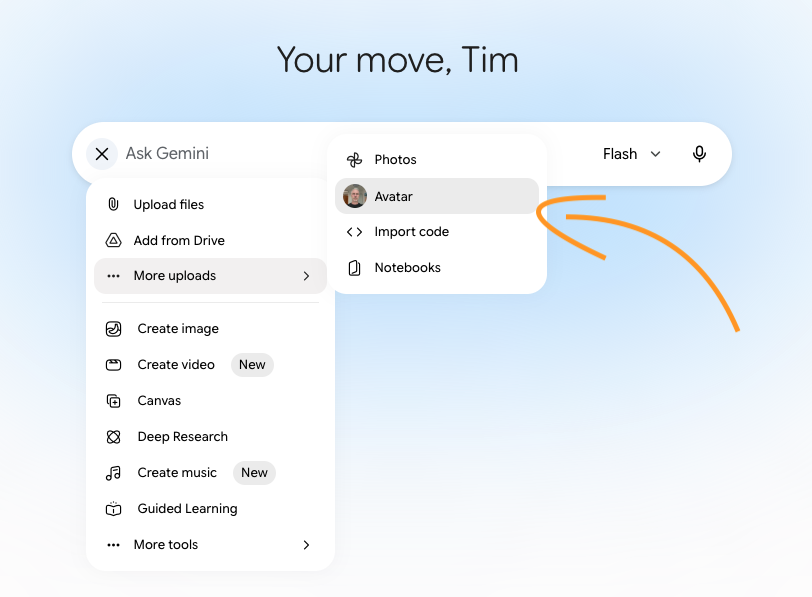
Start on your computer. Go to gemini.google.com and find the text box at the bottom, the one you normally type prompts into.
|
| |
|
Click Add files. In that menu, click More uploads, then click Avatar. A QR code appears on screen.
|
| |
|
|
| |
|
Step 2: Record your face and voice
|
| |
|
Pick up your phone or tablet and scan the QR code with the camera. It opens the recording flow and asks for camera and microphone access. Allow both. Then follow the on-screen instructions to record your face and voice.
|
| |
|
This takes about 2 mins. Google checks the recording before it accepts it, and a few specific things get it bounced:
|
| |
• Hold the phone at eye level, not down below your chin.
• Use light that isn't too dim or too bright. Face a window if you can.
• Keep your eyes, nose, and mouth visible. Glasses are fine.
• Record somewhere quiet, with no other voices anywhere in the background.
• Check what's behind you. No other people, and no photos or posters with faces in them.
|
| |
|
Watch out: The background-faces rule is the one that catches people. A family photo on the shelf, a poster, someone walking through the room, any of those can fail the recording. Record against a blank wall and you remove the most common reason for a retake.
|
|
| |
|
Take this seriously. The recording is the source of every video you generate later, so a careful 3 minutes here saves you a second recording session afterward.
|
| |
|
|
| |
|
Step 3: Finish and confirm on your computer
|
| |
|
Go back to your computer. The recording syncs across from your phone on its own.
|
| |
|
You get a chance to look at the result first. If it's good, click Use Avatar and it's saved to your account. If something feels off, the lighting, the framing, the audio, click Retake and run the recording again. Retake stays available permanently, so you're never locked into your first attempt.
|
| |
|
Don't rush this check. The avatar you confirm here is the one that represents you in everything you make next. It's worth 30 seconds of looking before you commit.
|
| |
|
|
| |
|
Step 4: Put your avatar into a prompt and generate a video
|
| |
|
| |
|
Now the fun begins.
|
| |
|
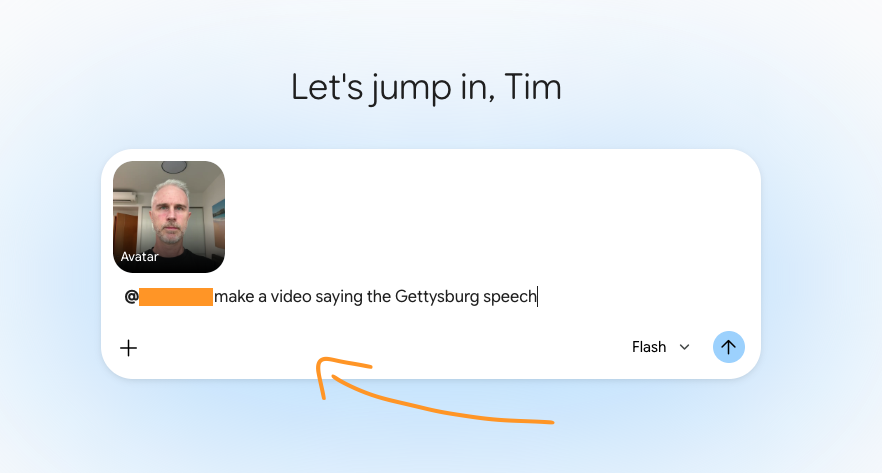
Back in the Gemini prompt box on gemini.google.com, you have 2 ways to call your avatar. Click Add files, then Avatar. Or type @ and pick your Google username from the menu that appears. Either way, your avatar drops into the prompt as @[your username].
|
| |
|
Then write the prompt around it. Here's one to copy and adjust:
|
| |
|
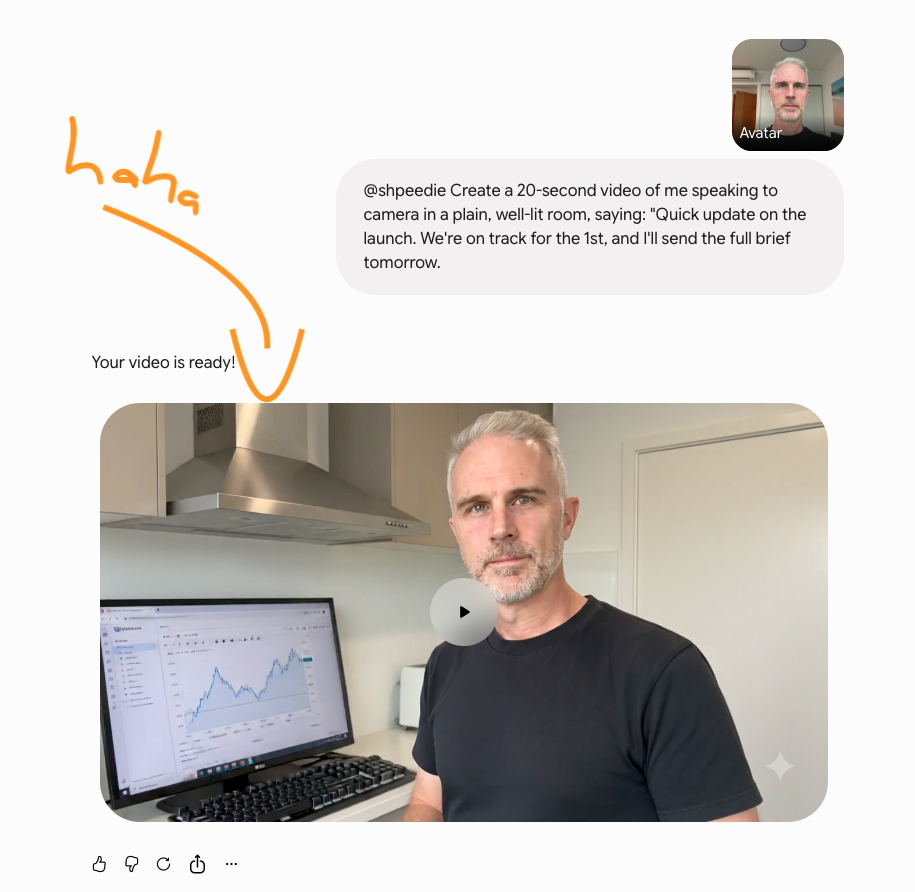
Create a 20-second video of @[your username] speaking to camera in a plain, well-lit room, saying: "Quick update on the launch. We're on track for the 15th, and I'll send the full brief tomorrow."
|
|
| |
|
Watch out: This is generated video, so treat the first few as experiments. Likeness and lip-sync quality vary, and it's English only right now. AI still has quirks like my avatar sitting at a computer under the kitchen exhaust extractor - random!
|
|
| |
|
| |
|
|
| |
|
Step 5: Find, retake, or delete your avatar
|
| |
|
Your avatar lives in your Google account, and you should know how to manage it.
|
| |
|
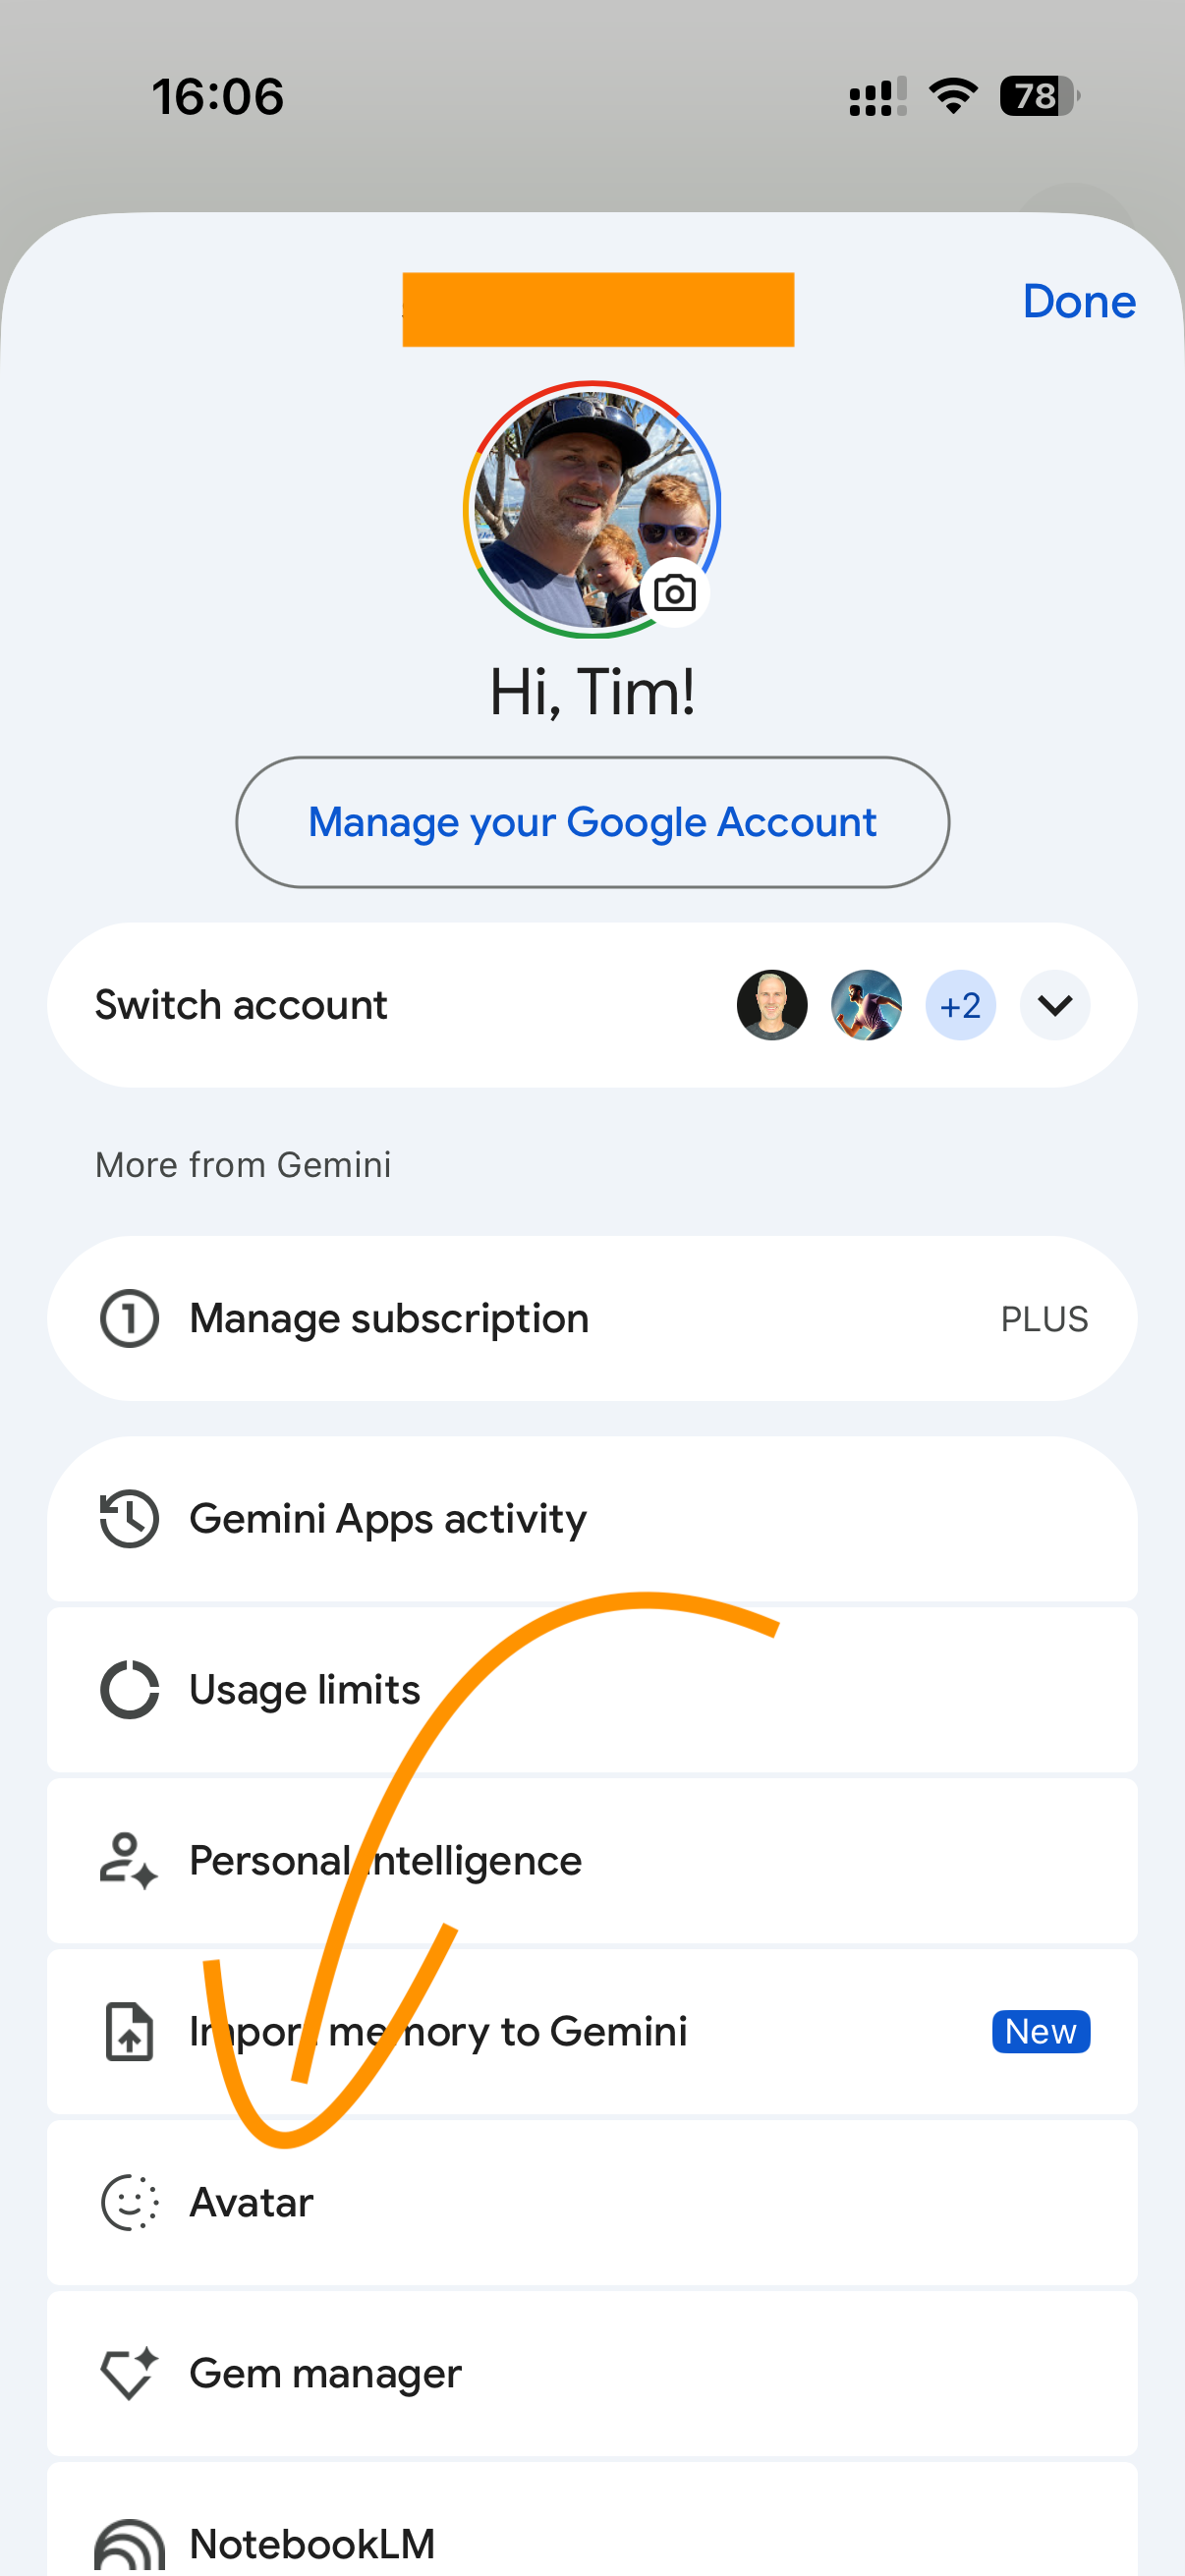
To find it: open the Gemini app on your phone, go to Settings, then Personal avatar. Retake is right there if you want to replace the recording.
|
| |
|
To delete it: on gemini.google.com, go to Settings, then Personal avatar, then Delete. That sends you to the Selfie video page of your Google Account, where you delete the actual selfie and voice recording.
|
| |
|
Here's the honest part, and it matters. Deleting removes your recordings from Google's systems and stops you from making any new content with that avatar. It does not delete videos you already made and published. Those stay exactly where they are.
|
| |
|
So delete is not an undo button. It closes the door going forward. Anything you have already generated and shared is out in the world for good. Plan for that before you publish, not after.
|
| |
|
| |