|
How to build a landing page in Claude Design
Step 1: Open the canvas and pick "Make a landing page"
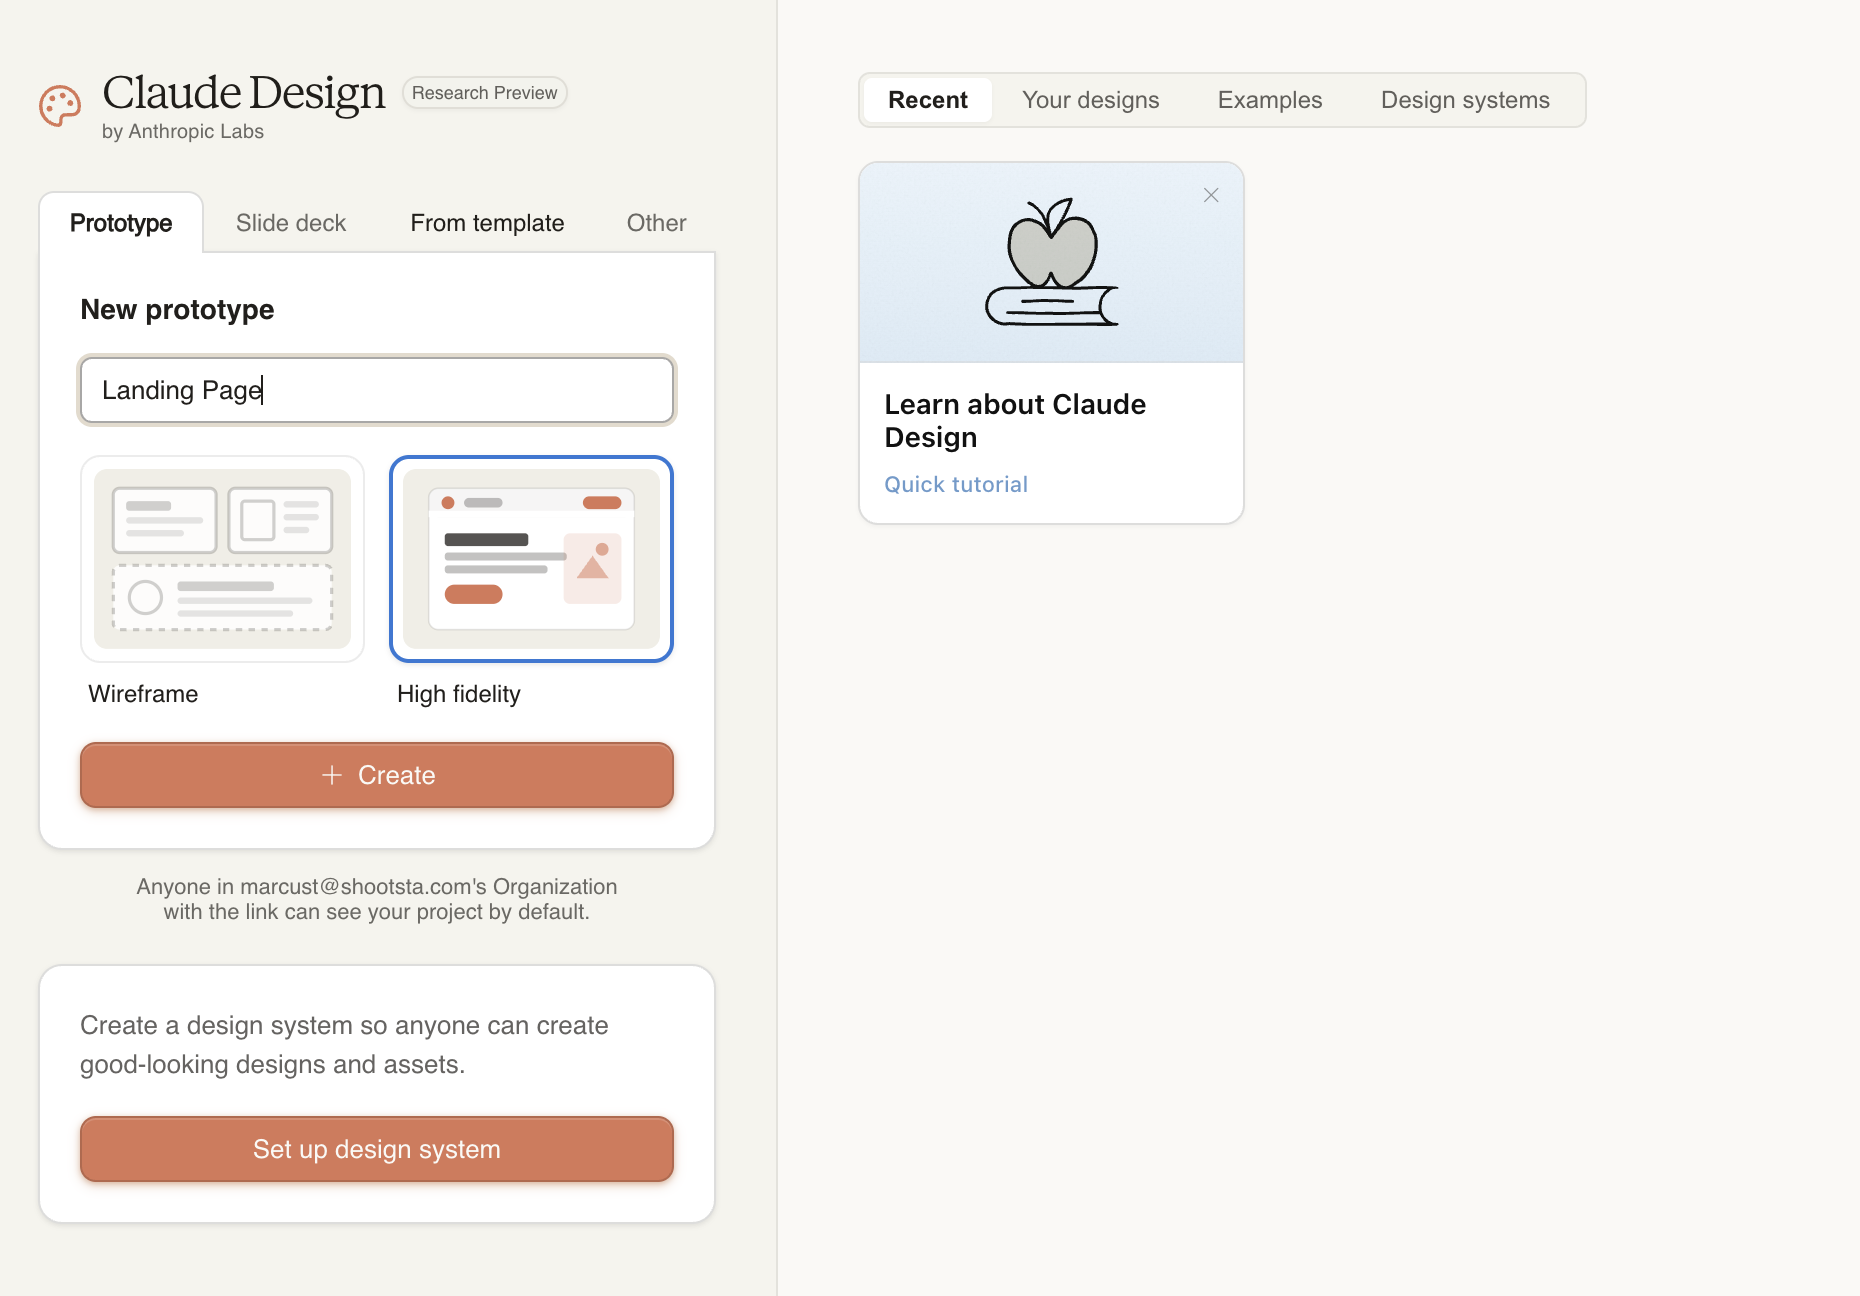
Go to claude.ai/design and sign in. The screen splits in two: chat pane on the left, canvas on the right. Across the top of the chat are template buttons: Make a deck, Make a prototype, Make a one-pager, Make a wireframe, Make a landing page.
Click New Prototype. The canvas stays blank. Claude is now primed to think in landing-page sections instead of slides.
|
Pro tip: The template buttons aren't doing anything magical. They're loading the right system prompt. If you start in the wrong template, tell Claude what you actually want in the next prompt and it'll switch.
|
Step 2: Attach context before you write a word
This is the step most people skip. They jump straight to the prompt, get a generic page back, and assume the tool isn't very good. The tool is fine. The input was thin.
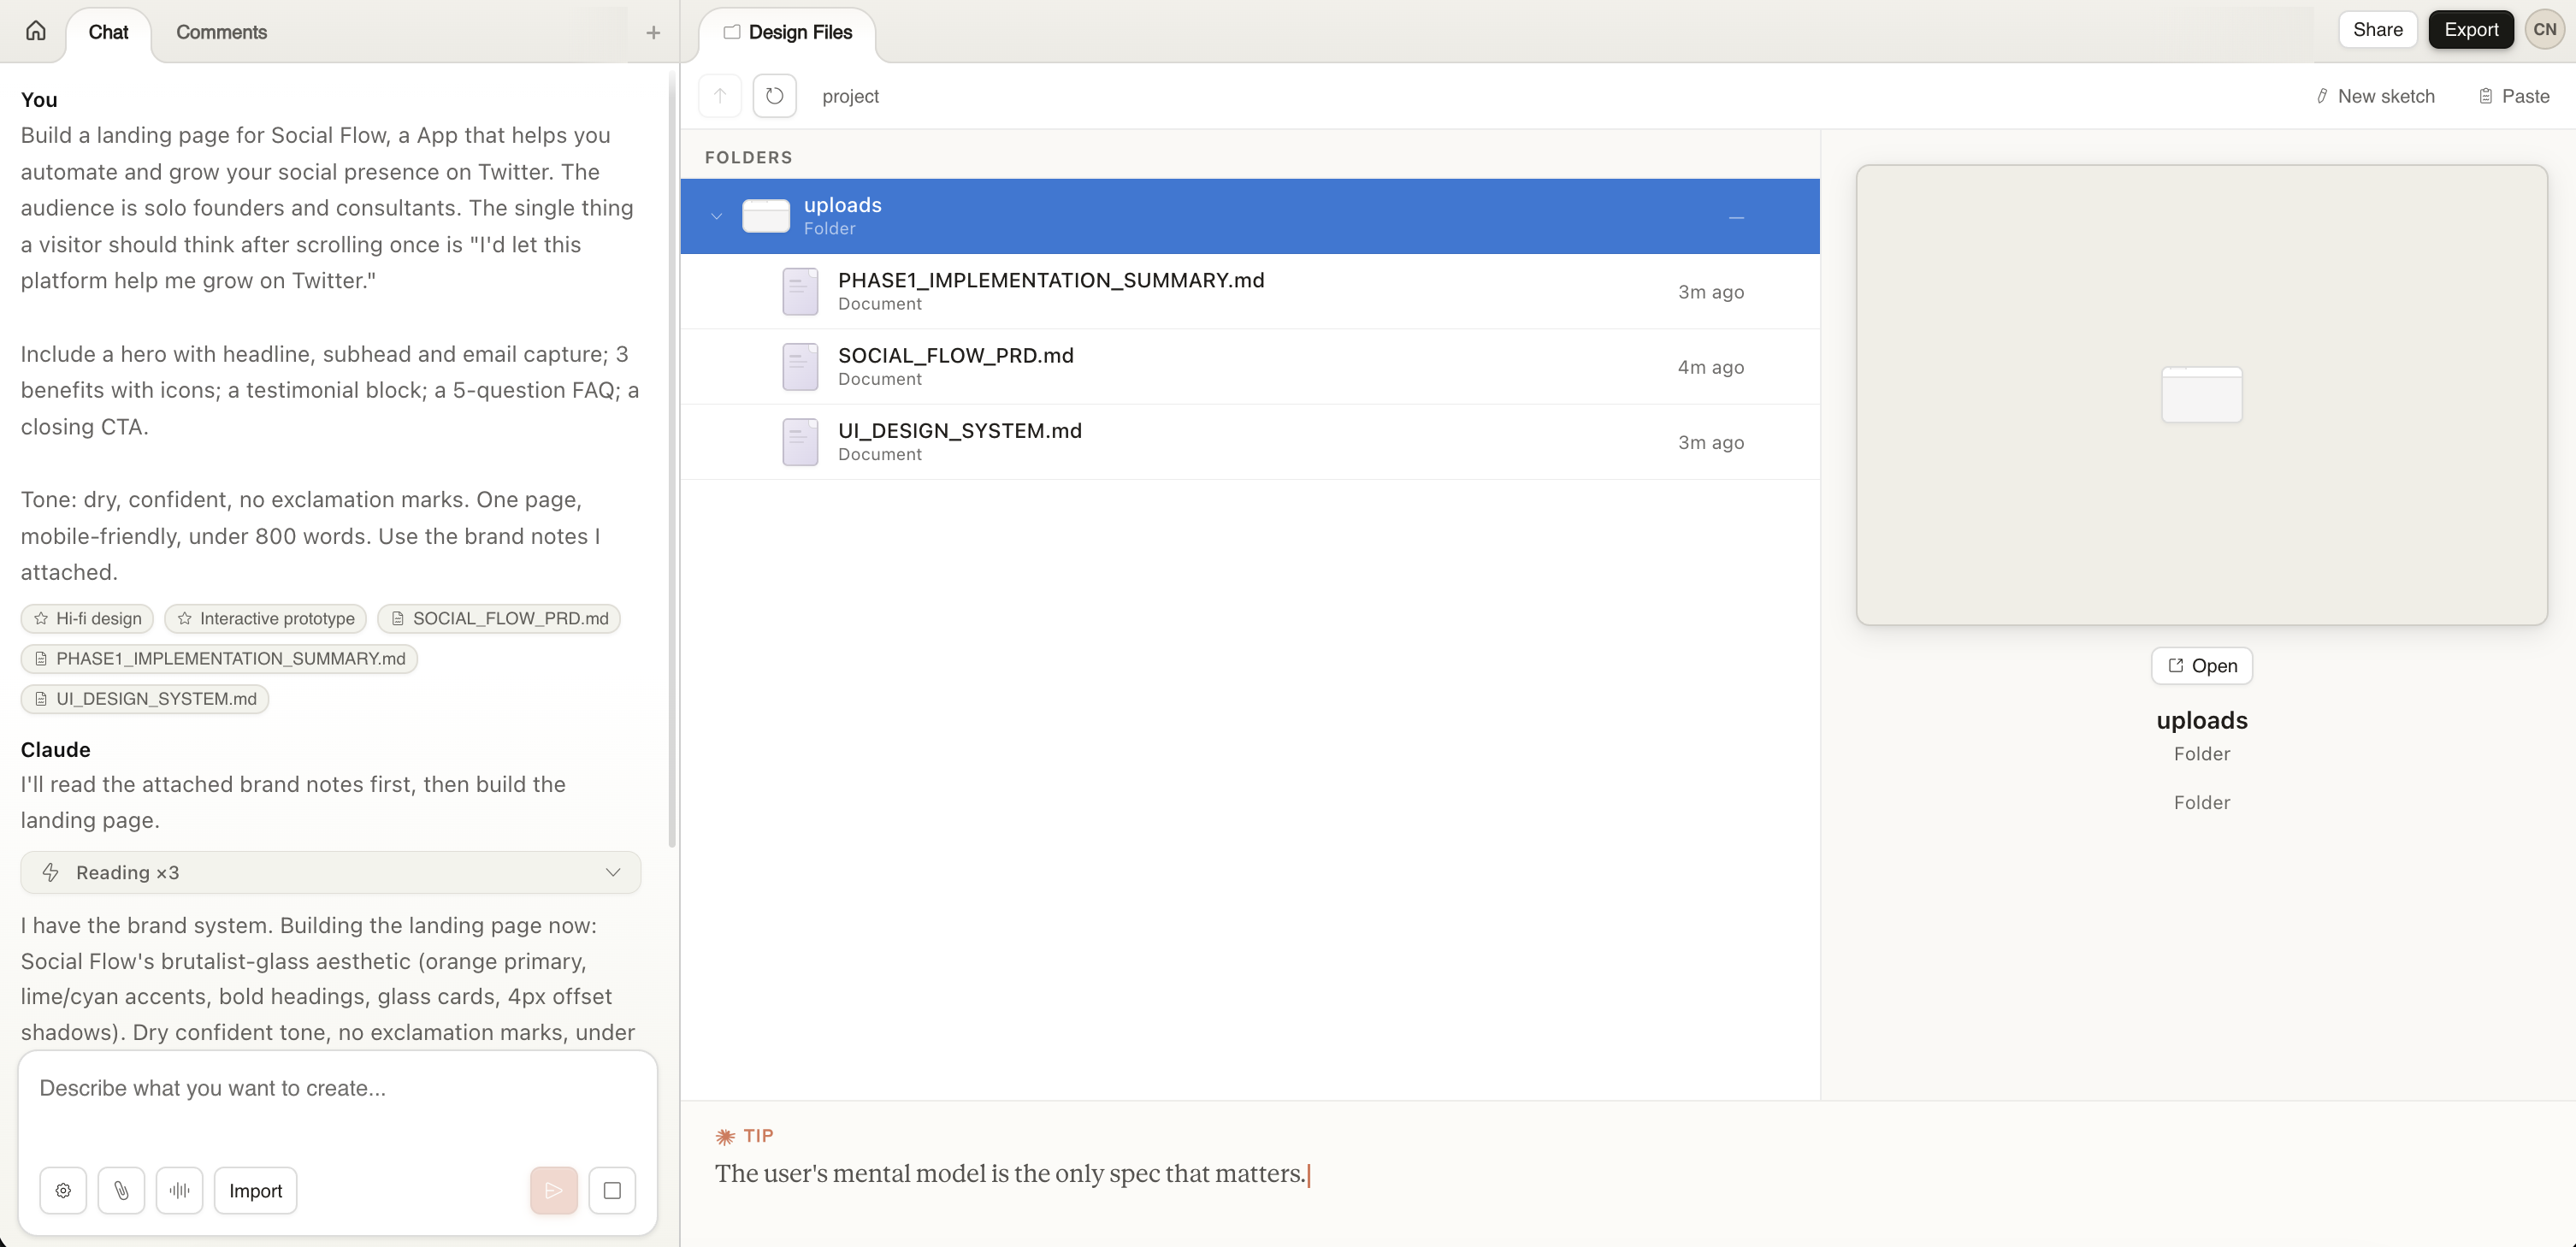
Before you type your prompt, drag 2 or 3 things into the chat pane:
1) A screenshot of a landing page you wish yours looked like (Stripe, Linear, Notion, whatever you'd point at and say "like that, but for me")
2) A short text file with your brand colors, fonts, and a one-line voice description ("dry, confident, no exclamation marks")
3) An existing logo or product screenshot if you have one
3 or 4 files, not 30. Claude has to read each one, and dumping a folder makes the first draft worse, not better.
|
Watch out: Don't paste your whole brand book. A 2-paragraph brief beats a 60-page PDF every time. You're anchoring the design, not giving Claude homework.
|
Step 3: Write the brief that does the heavy lifting
Here's the prompt pattern that consistently produces a usable first draft. Copy it, fill in the brackets, paste it into the chat:
|
Build a landing page for Social Flow, an app that helps you automate and grow your social presence on Twitter. The audience is solo founders and consultants. The single thing a visitor should think after scrolling once is: I'd let this platform help me grow on Twitter.
Include a hero with headline, subhead and email capture; 3 benefits with icons; a testimonial block; a 5-question FAQ; a closing CTA.
Tone: dry, confident, no exclamation marks. One page, mobile-friendly, under 800 words. Use the brand notes I attached.
|
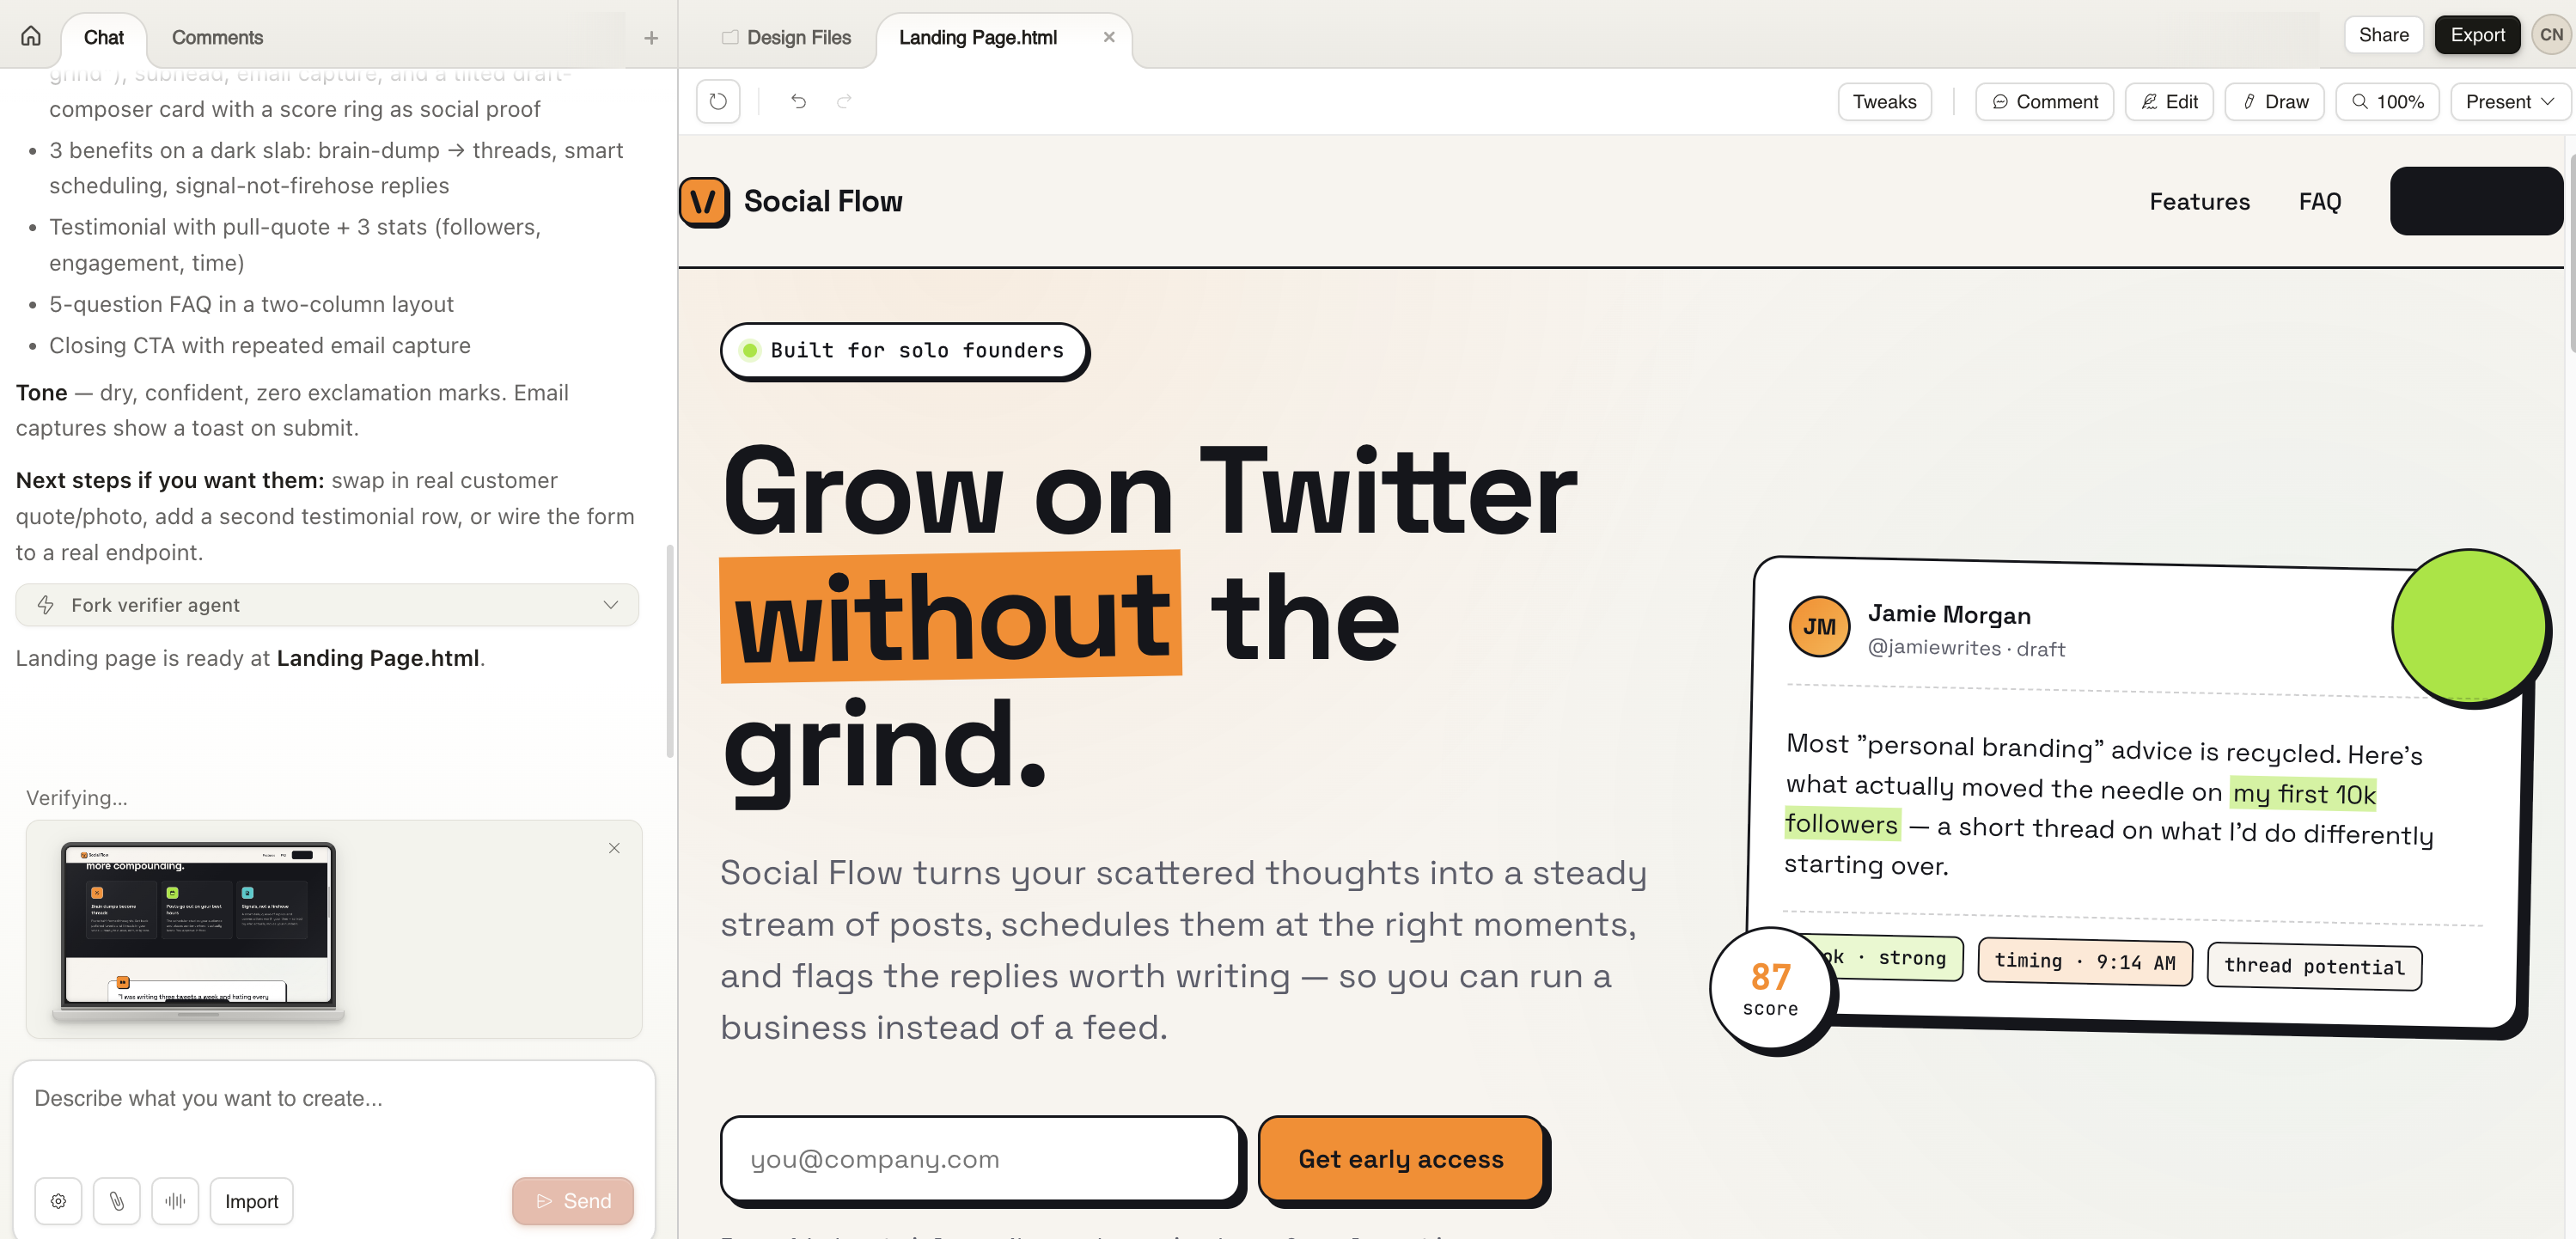
Hit send. Claude generates the first version onto the canvas in about 60 seconds. It won't be perfect. It'll be 80% of the way there, which is the only part that matters, because you can fix the other 20% in 5 minutes instead of writing it from scratch.
|
Watch out: "A landing page for my SaaS" is the prompt that produces the generic page everyone complains about. The brackets above exist to force you to be specific. If you're tempted to skip filling one in, that's the one most worth filling in.
|
Step 4: Refine with all 4 tools, not just chat
This is what separates Claude Design from "ChatGPT but it makes pages." You have 4 refinement tools. Everyone defaults to chat and never tries the other 3.
The chat pane works the way you'd expect: "Tighten the hero copy." "Swap the benefits and the testimonial." "Cut the FAQ to 3 questions."
Inline comments are the underused move. Click any element on the canvas and drop a comment directly on it: "this button is the wrong shade of blue," "the headline is fine, the subhead is what's killing me." Claude treats them like sticky notes from a stakeholder and acts on them.
Direct edits let you click into any text on the canvas and just type. No prompt round-trip. Use this for one-word copy fixes.
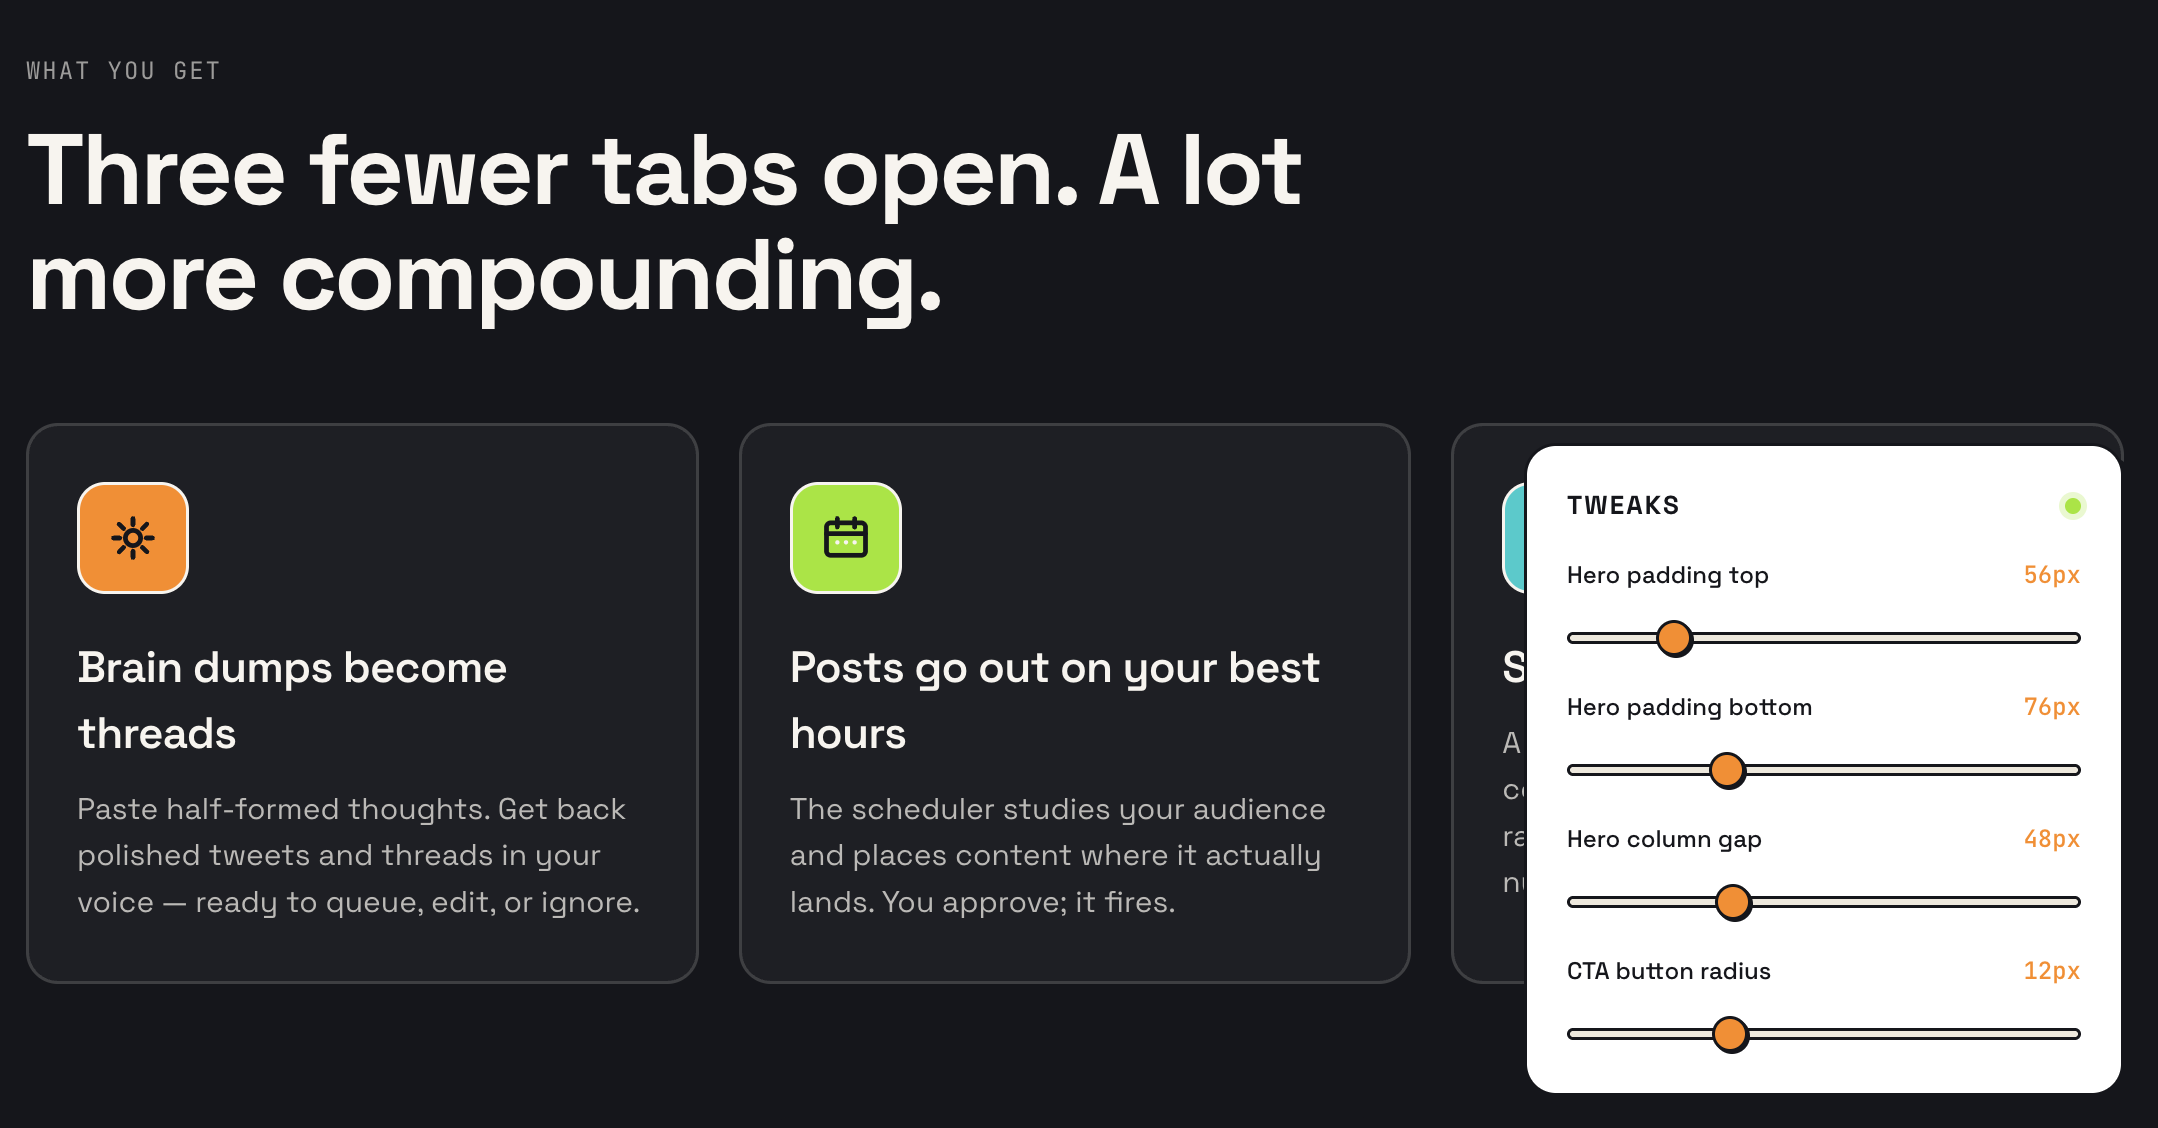
Custom sliders are the feature I am loving. Ask Claude "give me sliders to tweak the hero spacing and the CTA button's corner radius." It generates real sliders inside the canvas. You drag, the design updates live. No more "make it 8% rounder" guessing.
Here's the order I worked through on mine:
1) Chat to fix the structure (cut a section, reorder 2)
2) Inline comments on the hero ("subhead is too long, cut it in half")
3) Direct edits on the FAQ to rewrite 3 of the 5 questions in my own words
4) Sliders at the end to dial in spacing once everything else was right
|
Pro tip: Match the tool to the job.
• Chat for structure
• Inline comments for design feedback
• Direct edits for copy
• Sliders for "I'll know it when I see it"
Mixing all 4 is the actual workflow.
|
|
Watch out: Inline comments occasionally vanish before Claude reads them. If a comment doesn't trigger a change in about 10 seconds, paste the same text into the chat. Annoying, not blocking.
|
Step 5: Lock in your brand in 5 minutes
If you have a real codebase or design system, Claude can read it during onboarding and build a design system from it: your colors, your typography, your components. Every project after that uses your brand by default.
If you don't, spend 5 minutes giving it the basics by hand:
|
Use #2C81E5 as the primary accent, Inter for
headings, Source Sans Pro for body. Keep
buttons square-cornered. The vibe is editorial,
not playful.
|
Claude applies it across the whole page. The defaults before this step are tasteful (your page won't look bad even if you skip it), but it won't look like you. For an internal page or soft launch, defaults are fine. For something you're actually putting your name on, spend the 5 minutes.

Step 6: Export to standalone HTML and host it today
This is what makes Claude Design more than a demo. Hit export, choose Standalone HTML, and you get a single self-contained .html file with the CSS inlined and the assets bundled.
If you'd rather hand it to a developer to ship as a real component, choose Claude Code handoff instead. Claude packages the components, tokens, and structure into a bundle Claude Code can pick up with one instruction.
If you want it editable by a non-technical teammate later, Canva export keeps the layout and lets them tweak text in a tool they already know.
|
Pro tip: Standalone HTML is the right default for a side project. It costs nothing to host, you own the file, and you can re-import into Webflow or Framer later if the project grows. Don't over-engineer the first version.
|
To actually put it on the internet right now: drag the exported file into app.netlify.com/drop. You'll have a public URL in about 15 seconds. Free, no account required for the first deploy.
|


